If you’ve spent more than ten minutes researching cold plunge chillers, you’ve probably noticed that most of the information out there falls into two categories: vague spec comparisons that don’t explain what any of it means in practice, or thinly disguised product pages that recommend whatever the seller happens to stock.
This guide is neither. We manufacture cold plunge chillers and supply gyms, spas, hotels, and home users across more than 80 countries. We see what fails, what gets returned, and what people wish someone had told them before they spent $800 to $3,000 on a unit that doesn’t perform the way they expected.
The short version: choosing the right chiller for cold plunge use is mostly about matching the unit to your actual environment — not just your tub volume. Get that right and the rest is straightforward.
Why Most Cold Plunge Chiller Buying Guides Get It Wrong
The standard buying advice goes something like this: find your tub volume, look it up on a chart, pick the corresponding HP. Simple enough. The problem is that this approach treats every cold plunge setup as if it exists in identical conditions — same room temperature, same insulation quality, same usage frequency. Real setups vary enormously, and that variation is exactly where buyers get burned.
Here’s a scenario we see regularly. Someone buys a 1HP cold plunge chiller for their 250-litre inflatable tub based on a volume chart that says 1HP covers up to 300 litres. They set it up in their garage in Texas in August. The chiller runs constantly, never quite reaches the 10°C target, and the compressor fails within 18 months. The chart wasn’t wrong — it just didn’t account for the fact that their garage sits at 32°C in summer, and the inflatable tub has zero insulation.
The variable that volume charts consistently underweight is the temperature differential your cold plunge chiller is working against. Moving water from 32°C ambient down to 10°C in an uninsulated vessel requires dramatically more sustained cooling capacity than moving 20°C water in an insulated tub. Both “fit” a 250-litre spec on paper. The real-world performance difference is significant.
The second thing that gets glossed over is duty cycle — how often the compressor actually runs. A properly sized cold plunge chiller maintains temperature by cycling on when the water warms up and off when it reaches the target. In a well-insulated setup in a normal indoor environment, that might mean 20 to 30% run time. In a poorly insulated vessel in a hot environment, the compressor runs 70 to 90% of the time. Sustained continuous operation is the main cause of premature compressor failure in cold plunge chillers, and it’s almost always the result of undersizing rather than a manufacturing defect.
How to Size a Chiller for Cold Plunge the Right Way
There are four real variables that determine what you need. Work through them in order.
1. Tub volume
This is the baseline. 200 to 350 litres covers most solo home setups. 350 to 600 litres is duo or light commercial. Beyond 600 litres you’re into high-capacity commercial territory where the sizing conversation gets more specific.
One thing worth knowing: volume and immersion depth are not the same thing. A 400-litre rectangular tub might be wide and shallow, giving you a poor immersion experience despite the volume. A 300-litre purpose-built cold plunge barrel with 90cm depth gives you full shoulder immersion in less water. The chiller doesn’t care, but you will.
2. Insulation quality
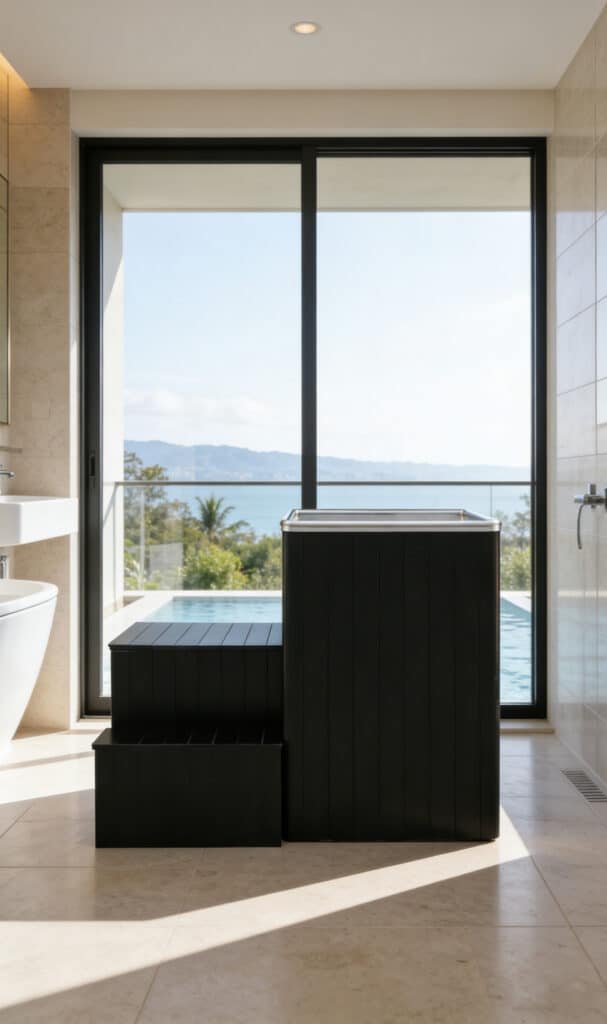
This is the single most important variable that volume-based charts ignore. A purpose-built cold plunge tub with 40 to 60mm of closed-cell foam in the walls holds temperature dramatically better than an uninsulated alternative.
To put it in concrete terms: a properly insulated 300-litre tub might lose 1°C per hour sitting idle. A standard bathtub of the same volume might lose 3 to 4°C per hour. Your cold plunge chiller isn’t just cooling the water — it’s continuously fighting heat coming in through the vessel walls. The better the insulation, the less work the chiller has to do, the longer it lasts, and the lower your electricity bill.
If you’re using an uninsulated vessel — bathtub, inflatable, stock tank, chest freezer conversion — you need to size your cold plunge chiller as if the volume is one tier higher than it actually is. A 250-litre uninsulated setup should be treated like a 350-litre insulated one for sizing purposes.
3. Ambient temperature
Where is the chiller going, and how hot does it get? A cold plunge chiller working in a 20°C indoor room is in a very different situation from the same unit in a 30°C outdoor space in summer. The ambient temperature directly affects how hard the compressor has to work to maintain your target.
Our general rule: if the setup is going outdoors, or in a garage or basement that gets above 25°C in summer, add 0.5HP to whatever the volume calculation suggests. If it’s going in a very warm climate — Southeast Asia, the Middle East, southern US states in summer — that buffer becomes more like 0.5 to 1HP depending on how extreme the peak temperatures get.
4. Usage frequency
A cold plunge chiller running two 15-minute sessions per day has a very different workload from one supporting a commercial gym where six to ten members are using the tub daily. Higher frequency means more heat introduction (body heat from each user), more filter load, and more total compressor run time.
For home use, any properly sized unit rated for cold plunge duty will handle this without issue. For commercial frequency, look specifically for units with commercial-rated compressors and higher duty cycle ratings — not just higher HP. A consumer-grade chiller rated at 1.5HP running at commercial frequency will outlast a commercial-grade 1HP unit for about 18 months before you notice the difference in longevity.
The practical sizing table:
| Setup | Recommended Cold Plunge Chiller HP |
|---|---|
| 200–350L insulated tub, indoor, temperate | 1HP |
| 200–350L insulated tub, outdoor or warm climate | 1.5HP |
| 200–350L uninsulated (inflatable/bathtub), indoor | 1.5HP |
| 200–350L uninsulated, outdoor or warm climate | 1.5–2HP |
| 350–500L insulated, indoor | 1.5HP |
| 350–500L insulated, outdoor or commercial | 2HP |
| 500L+ any configuration | 2HP+ |
For a full breakdown of how each variable interacts, including specific calculations by tub type and climate zone, see our cold plunge chiller HP guide.
What a Good Cold Plunge Chiller Actually Needs to Do
HP gets most of the attention but it’s one of the simpler specs to evaluate. The features that actually separate a cold plunge chiller worth buying from one that frustrates you after three months are less obvious.
Temperature floor — and what 0°C actually means
The temperature floor of a cold plunge chiller is the lowest it can reliably reach under normal operating conditions. This matters more than most buyers realise because the health research on cold water immersion consistently shows the most significant physiological responses occur at 10°C and below, with meaningful differences between 10°C and 3°C in terms of hormonal response, nerve engagement, and recovery impact.
Some water chiller for cold plunge units stabilise at 5 to 6°C and that’s their limit. Others reach 3°C. The best cold plunge chillers on the market reach genuine 0°C and can form ice — which is how they earn the “ice-making” description. For most home users doing general cold therapy and wellness, anything that reaches 5°C consistently is adequate. For serious athletes, physiotherapy applications, or commercial facilities where clients are paying for a premium experience, the difference between 5°C and 3°C or 0°C is meaningful.
Worth noting: a chiller’s stated temperature floor is measured under ideal conditions. Add an uninsulated vessel, a warm ambient environment, and high usage frequency, and the realistic floor climbs. A unit rated to 3°C might stabilise at 5 to 6°C in a hot garage. A unit rated to 0°C in the same conditions might hold 3°C. The gap between rated and real-world performance is why well-reviewed units at the same HP can perform very differently depending on where they’re installed.
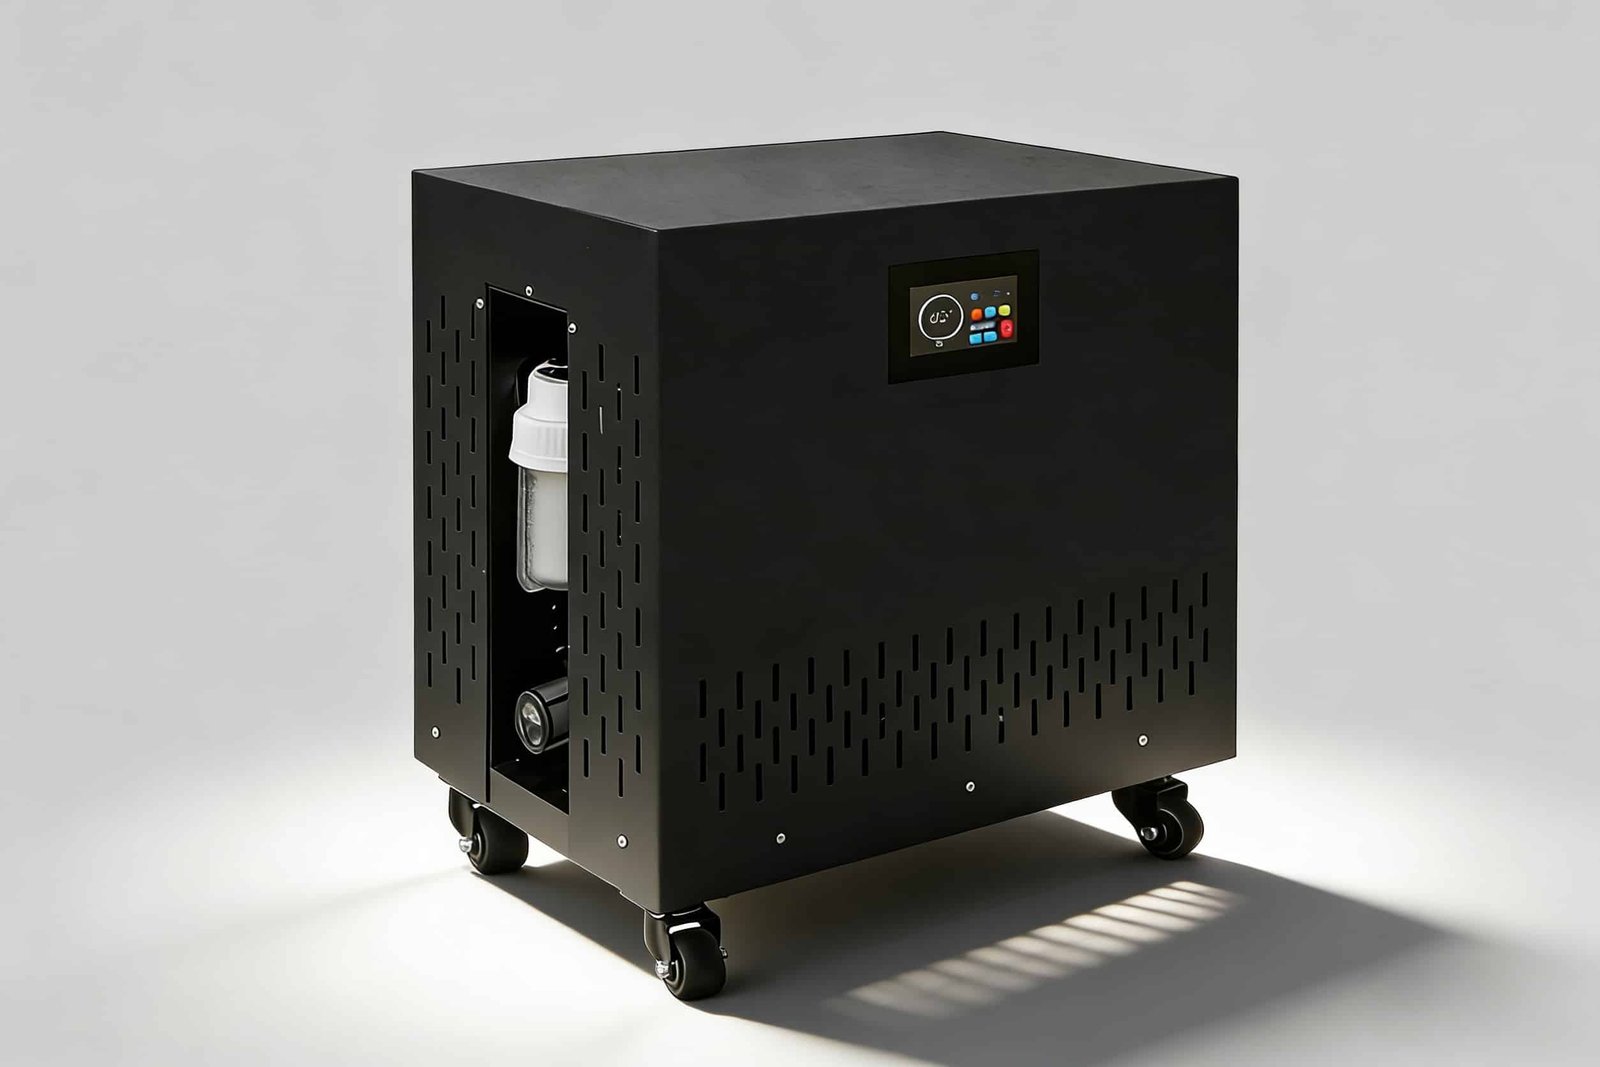
Filtration — the feature most buyers don’t think about until it breaks
A cold plunge chiller draws water continuously through its internal heat exchanger. Without adequate filtration upstream of that heat exchanger, you’re drawing in everything suspended in the water — hair, skin cells, oils, debris. Over time this causes partial blockages in the heat exchanger that reduce cooling efficiency, trigger flow alarms, and eventually require professional servicing or replacement of internal components.
The minimum viable filtration setup for any cold plunge chiller is an external cartridge filter rated at 20 to 50 microns, positioned on the inlet line before the chiller. This is straightforward to install and the cartridges are cheap to replace. Some cold plunge chiller units include this as part of the package — others assume you’ll source it separately. If a unit you’re considering doesn’t mention external filtration, it’s worth asking specifically.
Ozone disinfection is the other filtration-related feature worth understanding. Ozone is injected into the water and kills bacteria, viruses, and algae without chemical residue. In a cold plunge context — where water is reused for weeks at a time and warmed periodically by human bodies — ozone disinfection is the difference between water that stays clean and water that requires constant monitoring and chemical intervention. Units with built-in ozone generation are more expensive than those without, but the maintenance saving is real. Most people who’ve run both configurations switch to ozone and don’t go back.
Self-priming pump vs external pump
This comes down to installation complexity and flexibility. A cold plunge chiller with a built-in self-priming pump is simpler to set up — you connect two hoses and plug it in. There’s nothing else to source or configure. For home installations and straightforward commercial setups, this is the right choice.
External pumps give you more control over flow rate and allow longer hose runs — useful for installations where the chiller needs to be positioned further from the tub, or where multiple tubs share one chiller. If your setup is standard, built-in is easier. If it’s complex, external gives you the flexibility to design around your specific requirements.
OMNI Ice chillers are built specifically for cold plunge use — not repurposed aquarium or beverage cooling units. All models include external cartridge filtration, ozone disinfection, and compressors rated for the sustained duty cycles that cold plunge applications require. The range covers 0.8HP through 1.5HP, with units that reach genuine 0°C for ice-making capability.
Cold Plunge Chiller Running Costs: Ice vs Chiller Real Numbers
The “ice is cheaper” assumption is one of the most persistent myths in the cold plunge space, and it usually comes from people who haven’t actually run the numbers.
Here’s what ice actually costs for regular cold plunge use. A 300-litre tub needs approximately 20 to 25kg of ice to drop from ambient temperature to 10°C. Bagged ice at a gas station or grocery store runs $3 to $5 per 25lb bag — so you’re spending $6 to $10 per session just on ice, before you factor in the time spent buying it, carrying it, and disposing of the bags. For someone plunging five times a week, that’s $30 to $50 per week, or $130 to $200 per month.
And there’s a performance problem on top of the cost problem. Ice cools the water to your target temperature at the start, then the temperature rises steadily as the ice melts. By the time you’ve been in for 10 minutes, you’re no longer at 10°C — you might be at 13 or 14°C. The therapeutic window is the first few minutes, then it’s just cold water. According to Huberman Lab’s cold exposure research, effective cold immersion requires holding a consistent target temperature throughout the entire session to trigger the full physiological response — something ice alone cannot reliably deliver.
A 1HP cold plunge chiller running one session daily on a well-insulated 300-litre tub uses approximately 1.2 to 1.5 kWh per session to reach and maintain temperature. At the US average electricity rate of around $0.16 per kWh, that’s $0.19 to $0.24 per session — roughly $6 to $8 per month total. The water holds exactly your target temperature from start to finish, indefinitely.
The break-even calculation for a cold plunge chiller against ice depends on usage frequency. At three sessions per week, a mid-range chiller at $1,200 pays for itself in ice savings in roughly 14 to 18 months. At five sessions per week, that drops to 8 to 12 months. For gyms and commercial facilities running 6 to 10 sessions per day, the economics of a water chiller for cold plunge are not a close call.
The less quantifiable part is what you don’t have to do anymore: no ice runs, no lugging bags, no mess, no wondering whether the temperature is still where you need it. For a lot of regular cold plunge users, this operational simplicity is worth as much as the cost saving.
Setting Up a Chiller for Cold Plunge: What the Process Actually Looks Like
The setup process for a modern cold plunge chiller is genuinely simpler than most people expect going in. The fundamental sequence is the same regardless of which unit you buy.
Positioning the cold plunge chiller
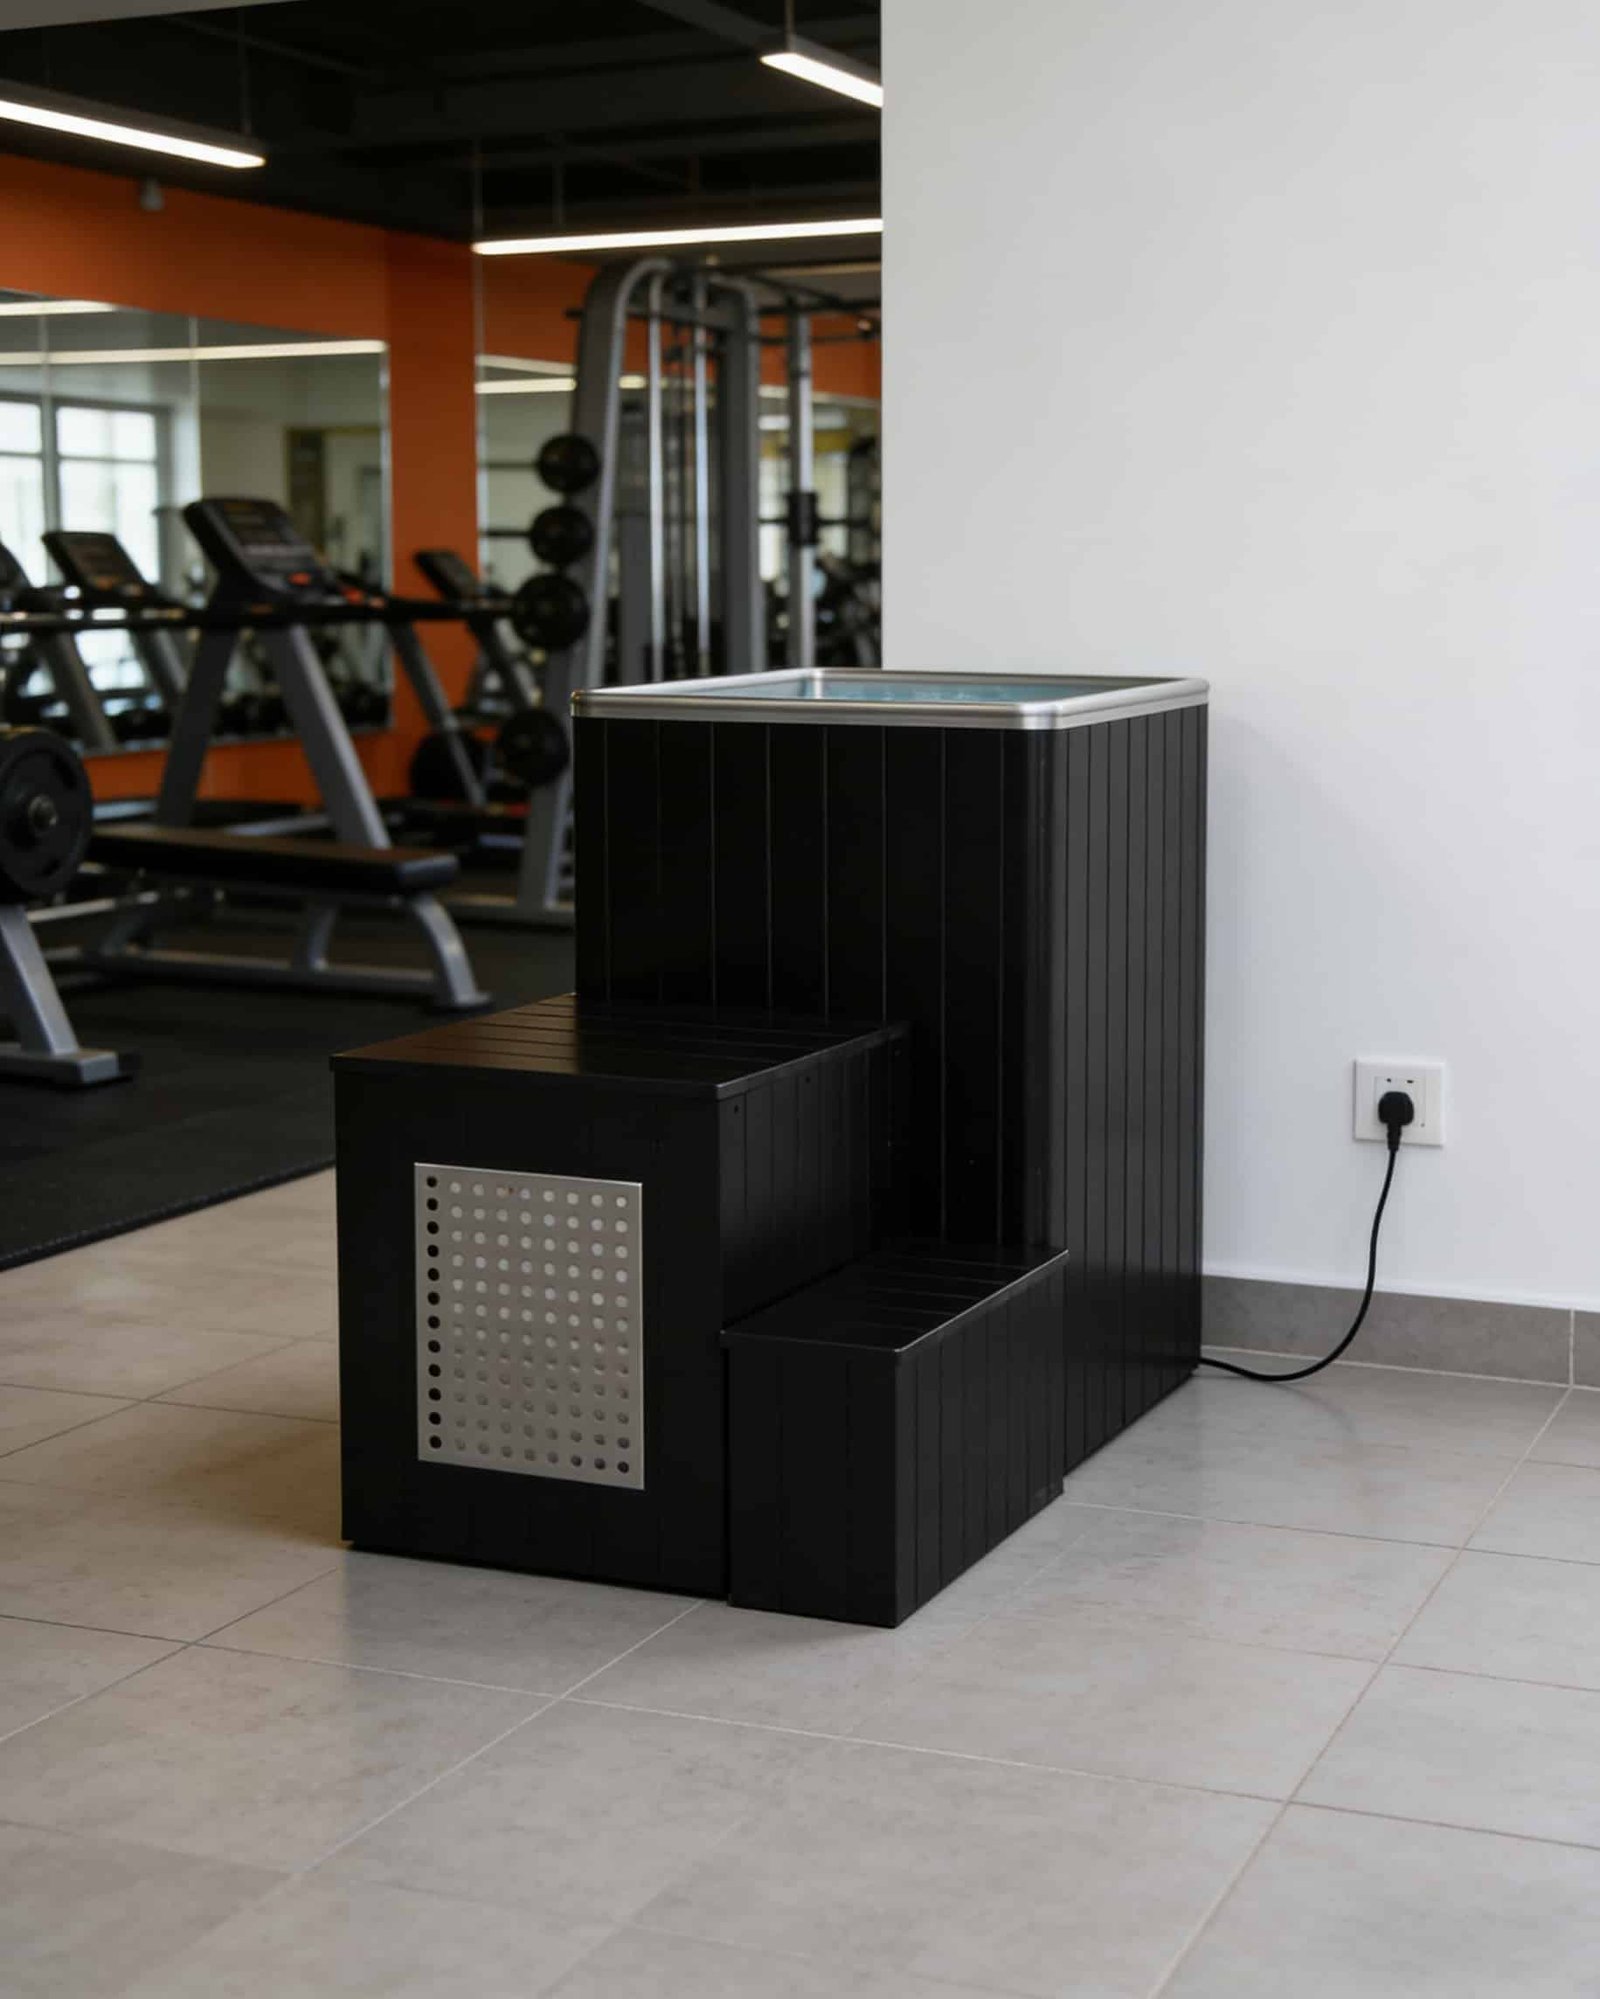
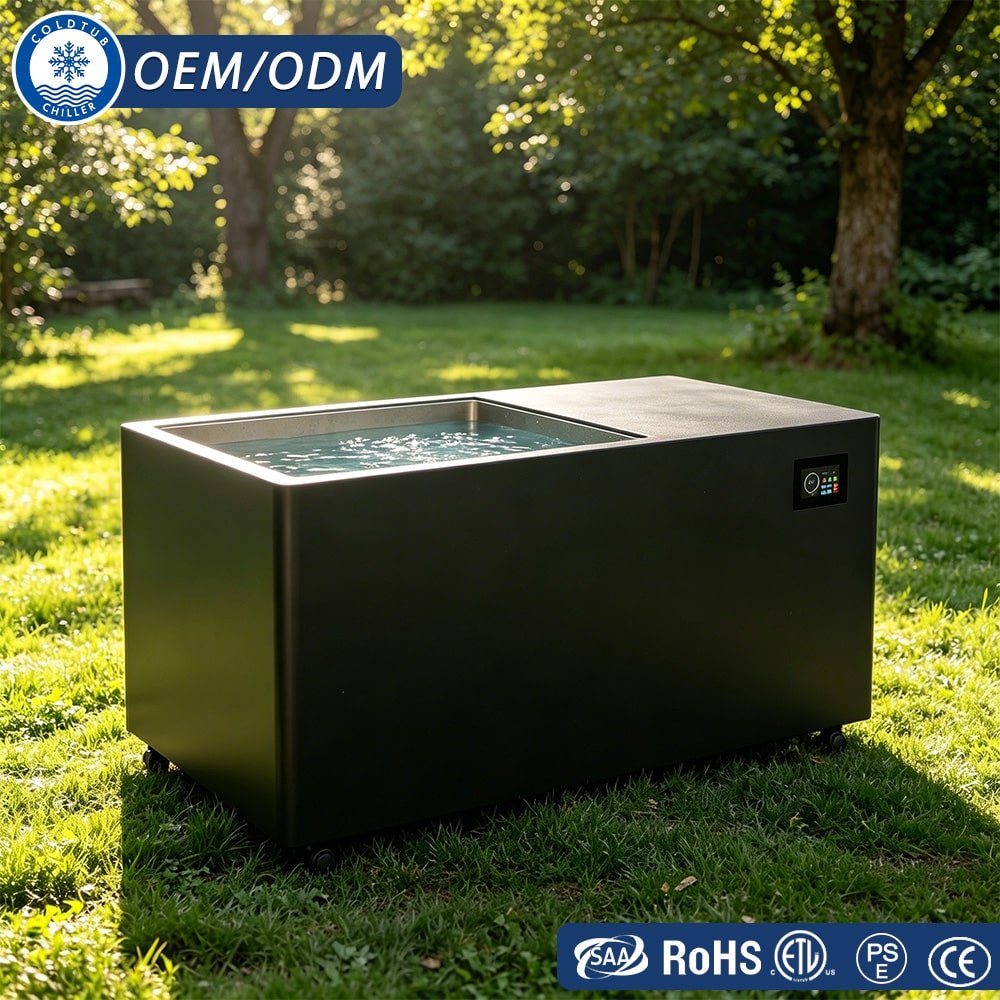
Place the unit close enough to the tub that your hoses reach comfortably — 1.5 to 2 metres of hose length is typical for most setups. You need clearance around the exhaust fan: 30cm minimum on the exhaust side, 15cm on the other sides. The exhaust fan blows warm air outward — if it’s recirculating its own warm exhaust because it’s too close to a wall, the cold plunge chiller’s effective cooling capacity drops noticeably.
For outdoor cold plunge setups, positioning the chiller in shade rather than direct sun makes a meaningful difference to performance and longevity. A chiller sitting in direct sun in summer is working against a much higher ambient temperature than its specs assume.
Connecting the system
The flow sequence for a cold plunge chiller system is: tub outlet → filter → chiller → tub inlet. That order is non-negotiable. Water needs to pass through the filter before it reaches the heat exchanger, not after. A filter positioned after the chiller doesn’t protect the heat exchanger from debris — which is the whole point of having one.
Most modern cold plunge chiller units connect via 3/4-inch or 1-inch push-fit or threaded hose fittings. Standard reinforced PVC hose works well — avoid thin-walled garden hose, which can collapse under the suction of the pump and restrict flow. If you’re running hoses over the rim of the tub rather than through dedicated ports, use weighted hose holders or cable ties to keep the inlet and outlet properly positioned.
First startup
If the pump is built in and self-priming, you typically just need to fill the tub, start the system, and let it prime itself within a minute or two. If there’s significant air in the hose line, you may need to pour water into the inlet hose before starting to help the pump pick up flow. Once the pump is circulating, set your target temperature and give the system time to work.
For a 300-litre cold plunge tub starting from room temperature water at 20°C, expect 60 to 90 minutes to reach 10°C with a 1HP chiller in a normal indoor environment. Reaching 3 to 5°C takes 2 to 2.5 hours. The first cooldown is always the longest — subsequent sessions start from a closer baseline if you maintain temperature between uses rather than letting the water return to ambient.
For outdoor-specific setup considerations and what changes when your cold plunge chiller is operating in direct sun or high ambient temperatures, see our outdoor cold plunge guide.
Which Cold Plunge Chiller Setup Is Right for You
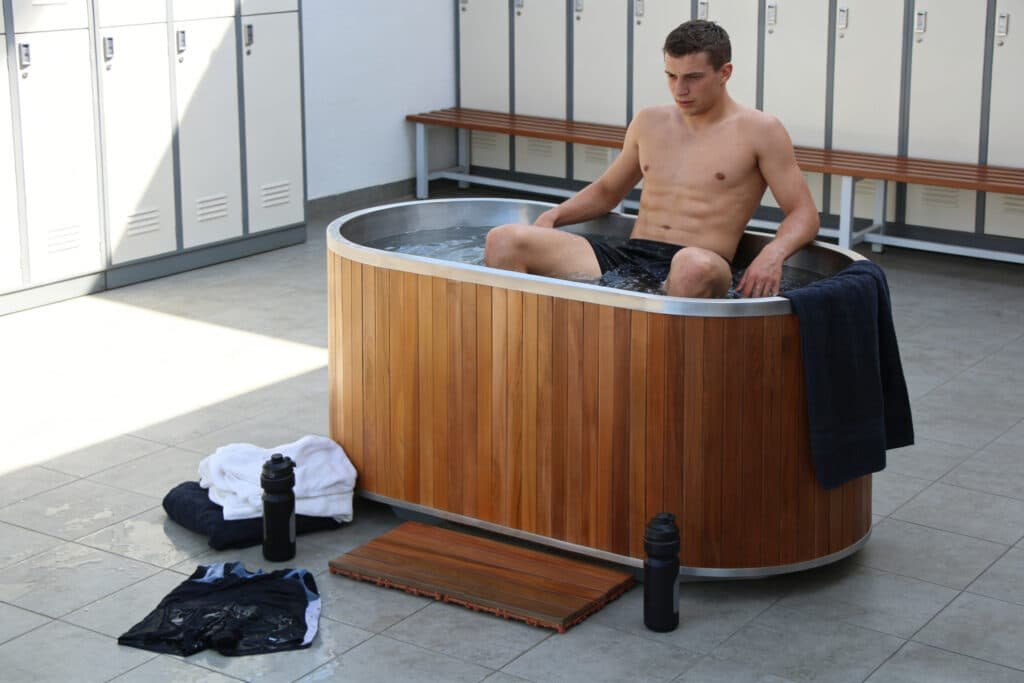
Home users doing regular cold therapy
One or two people, one to two sessions daily, primarily for recovery after training or general wellness. The core requirements are a cold plunge chiller that reaches your target temperature reliably, runs quietly enough not to be annoying, and doesn’t need constant attention. A 1HP unit with built-in filtration and ozone sanitation handles this well. WiFi temperature control is a genuine quality-of-life feature for home use — being able to set the tub pre-cooling before you get home from training takes one decision out of the process.
If you’re pairing the chiller with a bathtub or inflatable rather than a purpose-built tub, read the insulation section above carefully before sizing. The failure mode here is almost always a chiller that’s technically adequate for the water volume but undersized for the thermal environment.
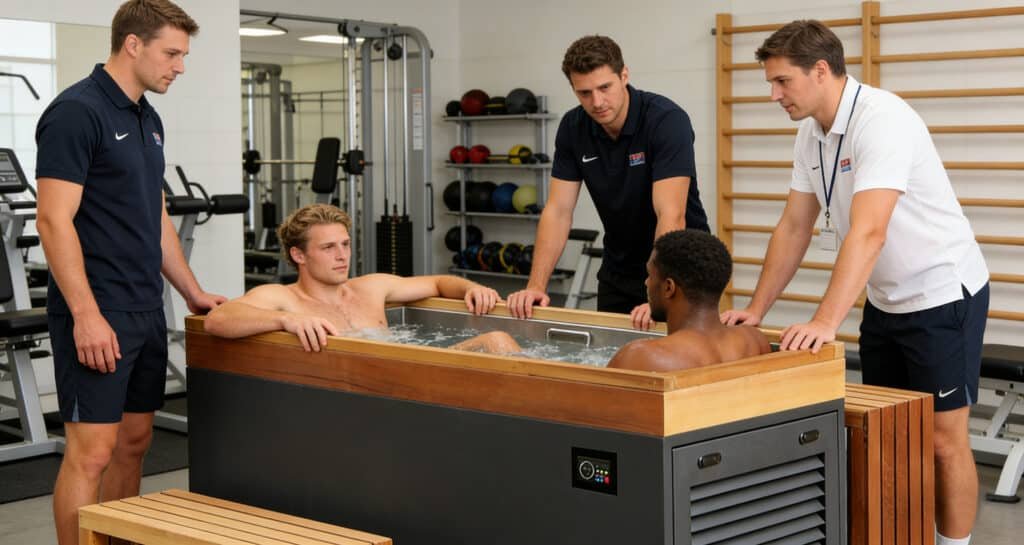
Small gyms and boutique fitness studios
Typically 10 to 30 members using a cold plunge as part of their recovery offering, with 4 to 8 sessions per day at peak. The cold plunge chiller needs a commercial-rated duty cycle, not just higher HP. Budget for 1.5HP minimum and look specifically for units designed for continuous commercial operation. For how to structure the business case — pricing, member communication, ROI timeline — our cold plunge for small business guide covers this in detail with real numbers.
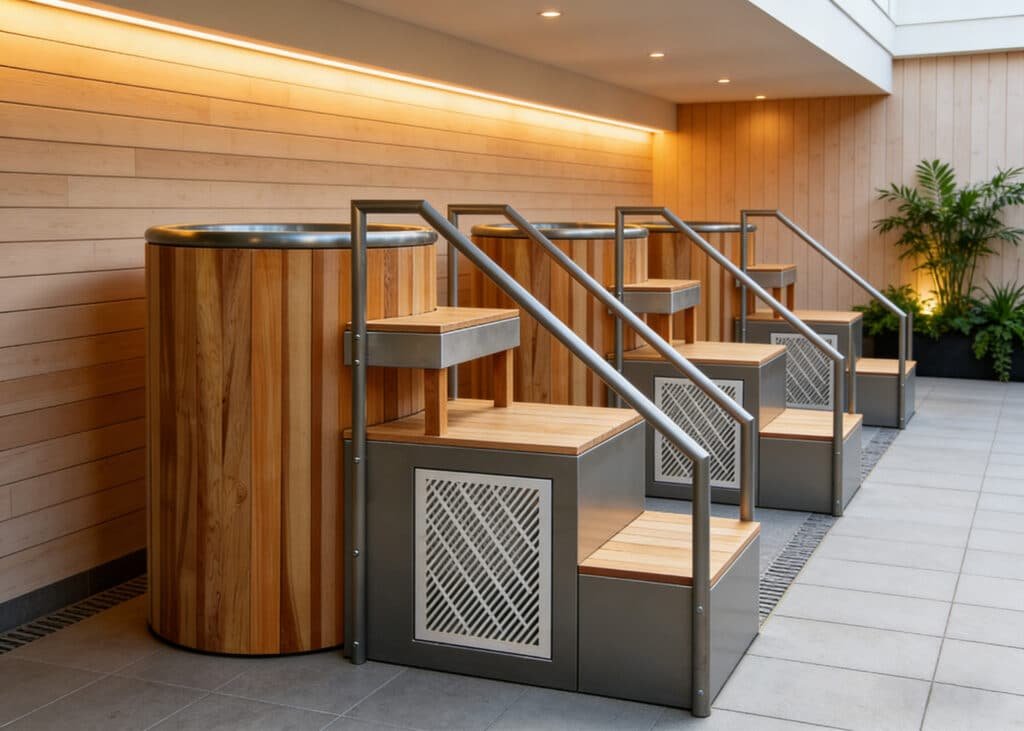
Hotels and spas
High traffic, guest-facing environment, silent operation is a requirement rather than a preference. The other consideration that doesn’t come up in home or gym contexts is water hygiene at scale. A spa tub used by 20 guests per day has a very different water management challenge from a home tub used by one person. Ozone disinfection is essentially mandatory at this usage level. For the full set of considerations specific to hospitality installations, our hotels and spas buyer’s guide covers sizing, water management, and integration with existing spa operations.
DIY and existing container setups
Using a chest freezer conversion, stock tank, bathtub, or other improvised vessel. The cold plunge chiller requirements here are dominated by the insulation situation — almost all DIY vessels are uninsulated or lightly insulated, which means sizing up and managing expectations on electricity costs. Our DIY cold plunge setup guide covers what you actually need and what the common failure points are for DIY builds.
For hot tub conversions specifically — which have their own set of complications around existing heating systems and larger water volumes — the considerations are different enough to warrant their own guide: cold plunge chiller for hot tub.
The OMNI Ice CHM-10 is the model most home users end up with — 1HP, built-in pump, ozone, external filter, WiFi control, and a temperature range of 3°C to 42°C for contrast therapy. It covers everything a home cold plunge setup needs without requiring separate components.
Cold Plunge Chiller FAQ
Q: What HP cold plunge chiller do I need for a 300-litre tub?
A: For a properly insulated 300-litre cold plunge tub in a normal indoor environment, 1HP is the standard recommendation and handles the job well. If the tub is uninsulated — a bathtub, inflatable, or stock tank — use 1.5HP. For outdoor cold plunge setups in warm climates, 1.5HP is again the minimum regardless of volume. The insulation and environment variables matter as much as the volume number.
Q: How cold can a cold plunge chiller actually get?
A: Entry-level cold plunge chiller units typically stabilise at 5 to 6°C under normal conditions. Mid-range units reach 3°C. Premium units reach 0°C and can generate ice — these are the ones marketed as “ice-making” chillers. For general cold therapy and wellness, reaching 5°C consistently delivers the core benefits. Serious athletic recovery applications and commercial facilities where clients expect a true ice bath experience benefit from a cold plunge chiller that reaches 0°C.
Q: Can I run a chiller for cold plunge outdoors year-round?
Q: How long does a cold plunge chiller last?
A: A correctly sized cold plunge chiller that runs at a normal duty cycle — not pushed to continuous maximum load — should last 5 to 10 years with standard maintenance. The main longevity killer is chronic undersizing, which forces the compressor to run without adequate rest cycles. Units that are sized correctly for their environment and usage frequency have significantly longer service lives than those that are always working at the edge of their capacity.
Q: What maintenance does a cold plunge chiller actually require?
A: Less than most people expect. Replace the external filter cartridge every 4 to 8 weeks depending on how heavily the tub is used. Keep the water topped up as evaporation occurs. Run the ozone disinfection system according to the manufacturer’s schedule — usually a 30-minute cycle every 24 to 48 hours. For a single-user home cold plunge setup with proper filtration, a full water change every 30 to 60 days is typically sufficient. Without filtration, that drops to every 5 to 7 days.
Q: Can I use a cold plunge chiller with my existing bathtub?
A: Yes, though a standard bathtub has some real limitations for cold plunge use that are worth understanding before you buy. The main issues are lack of insulation — which increases chiller workload and running costs — and depth, which limits how much of your body is submerged. For a full breakdown of what works and what doesn’t in a bathtub cold plunge setup, our cold plunge chiller for bathtub guide covers the honest assessment.