A complete cold plunge system featuring a chiller, external filter, and stainless barrel tub
Installing a cold plunge chiller and filter system is the smartest way to maintain consistent water temperature and hygiene—without the hassle of ice bags or constant cleaning. But how do you select the right components and ensure they work together?
This guide breaks down how to build a complete system, including pump, chiller, filter, and tub. Whether you’re creating a home recovery station or a spa feature, we’ll show you what works—and why.
However, if you want to understand why filtration is critical for long-term water safety, hygiene, and system longevity, it’s important to first understand the full logic behind filtered cold plunge systems.
🧊 What Is a Cold Plunge System with Chiller and Filter?
At its core, a cold plunge system includes:
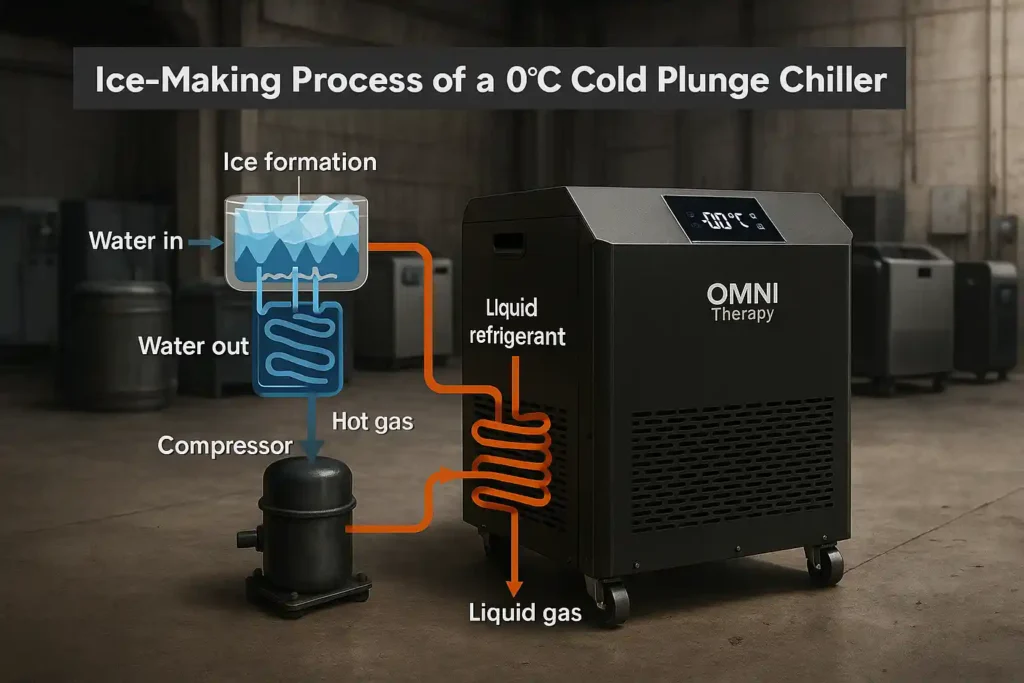
A chiller to cool and circulate water
A filter to trap debris and maintain water clarity
A pump (built-in or external) to drive flow
A plunge tub that matches water volume and insulation needs
Using a filter is essential to protect the chiller and maintain sanitation. Without it, hair, dirt, and organics can clog the water line or even damage internal parts.To understand how filtration directly impacts recovery quality and long-term water safety, see our complete guide to cold plunge chiller with filter.
Cold plunge system with chiller, filter, and tub layout
🛠 Recommended Cold Plunge Setup: WT-13 + CHU-10-RV
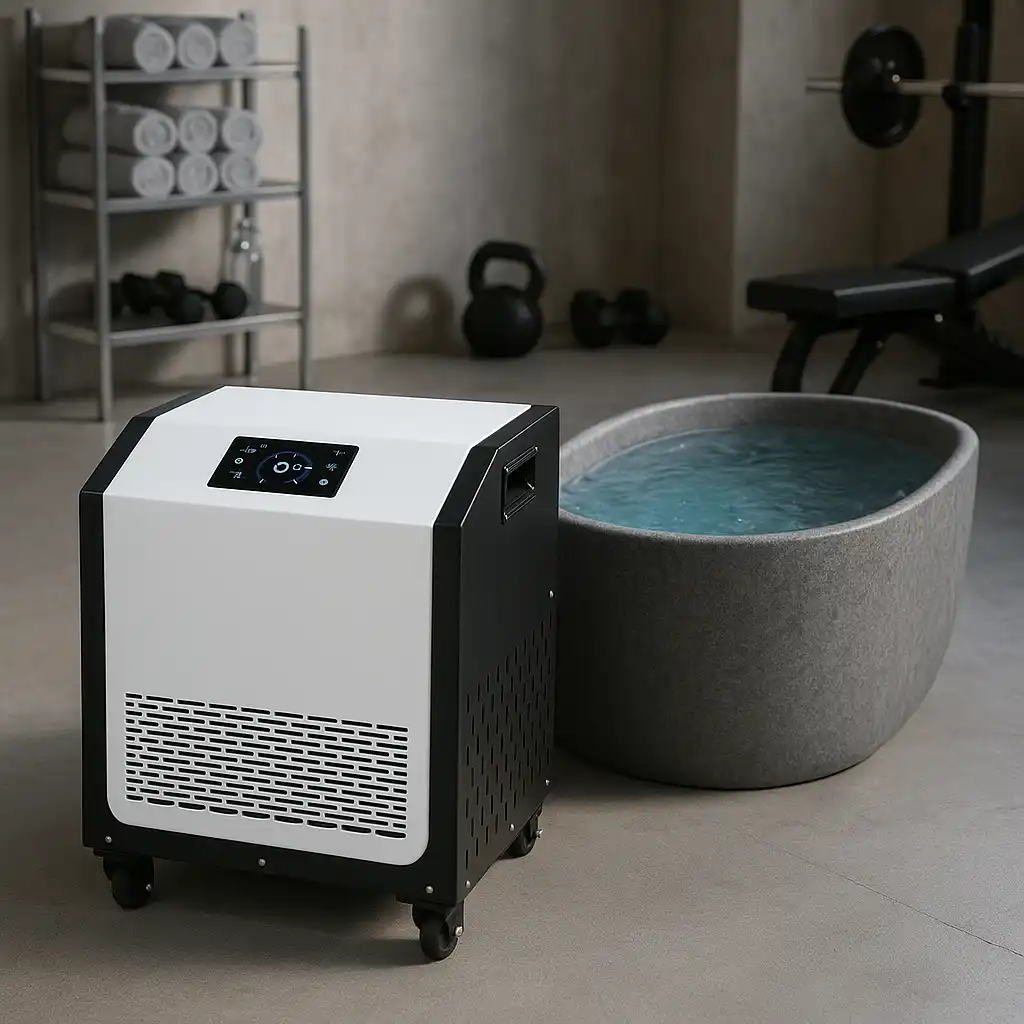
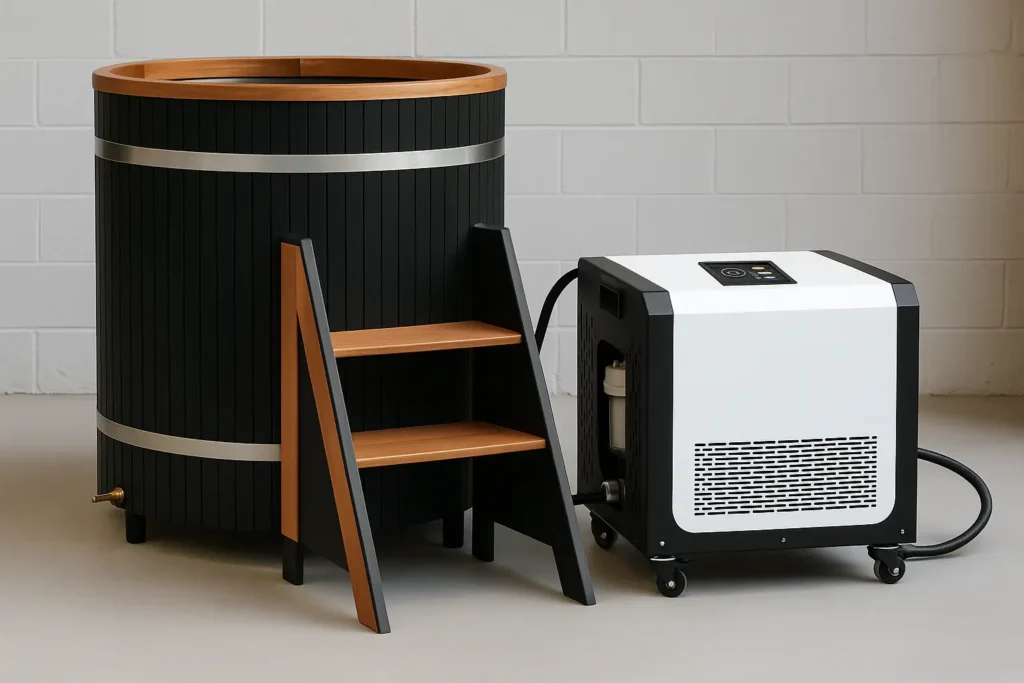
We recommend pairing the WT-13 hybrid cold plunge barrel with the CHU-10-RV 1HP Ice Making Chiller, connected via an external filter and pump kit.s type of configuration is commonly used because it balances cooling power, filtration efficiency, and long-term water hygiene.
✅ WT-13 Barrel Tub Highlights:
Red cedar exterior + black 304 stainless steel liner
Built-in insulation, foam cover, and step for easy entry
Water capacity ~300L, ideal for single or dual users
👉 View WT-13 Product Details
✅ CHU-10-RV Chiller Highlights:
1HP cooling power (down to 0°C)
External filter and suction pump supported
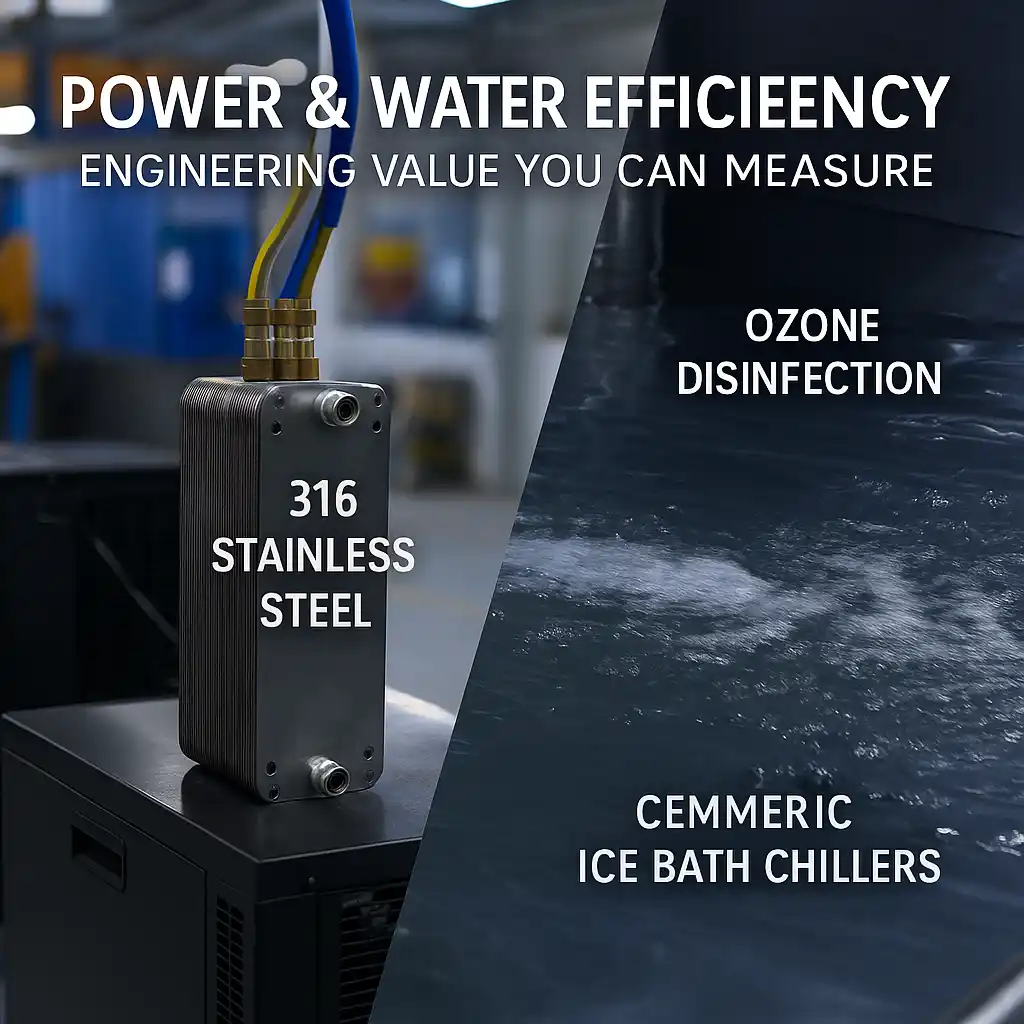
WiFi control + ozone disinfection system
👉 Check CHU-10-RV Chiller
This setup example is discussed in more detail in our cold plunge chiller with filter complete guide, where filtration logic and system design are explained step by step.
Together, this combo provides an efficient, compact, and professional-grade cold plunge solution.
🔄 Choosing the Right Filter for Cold Plunge Chillers
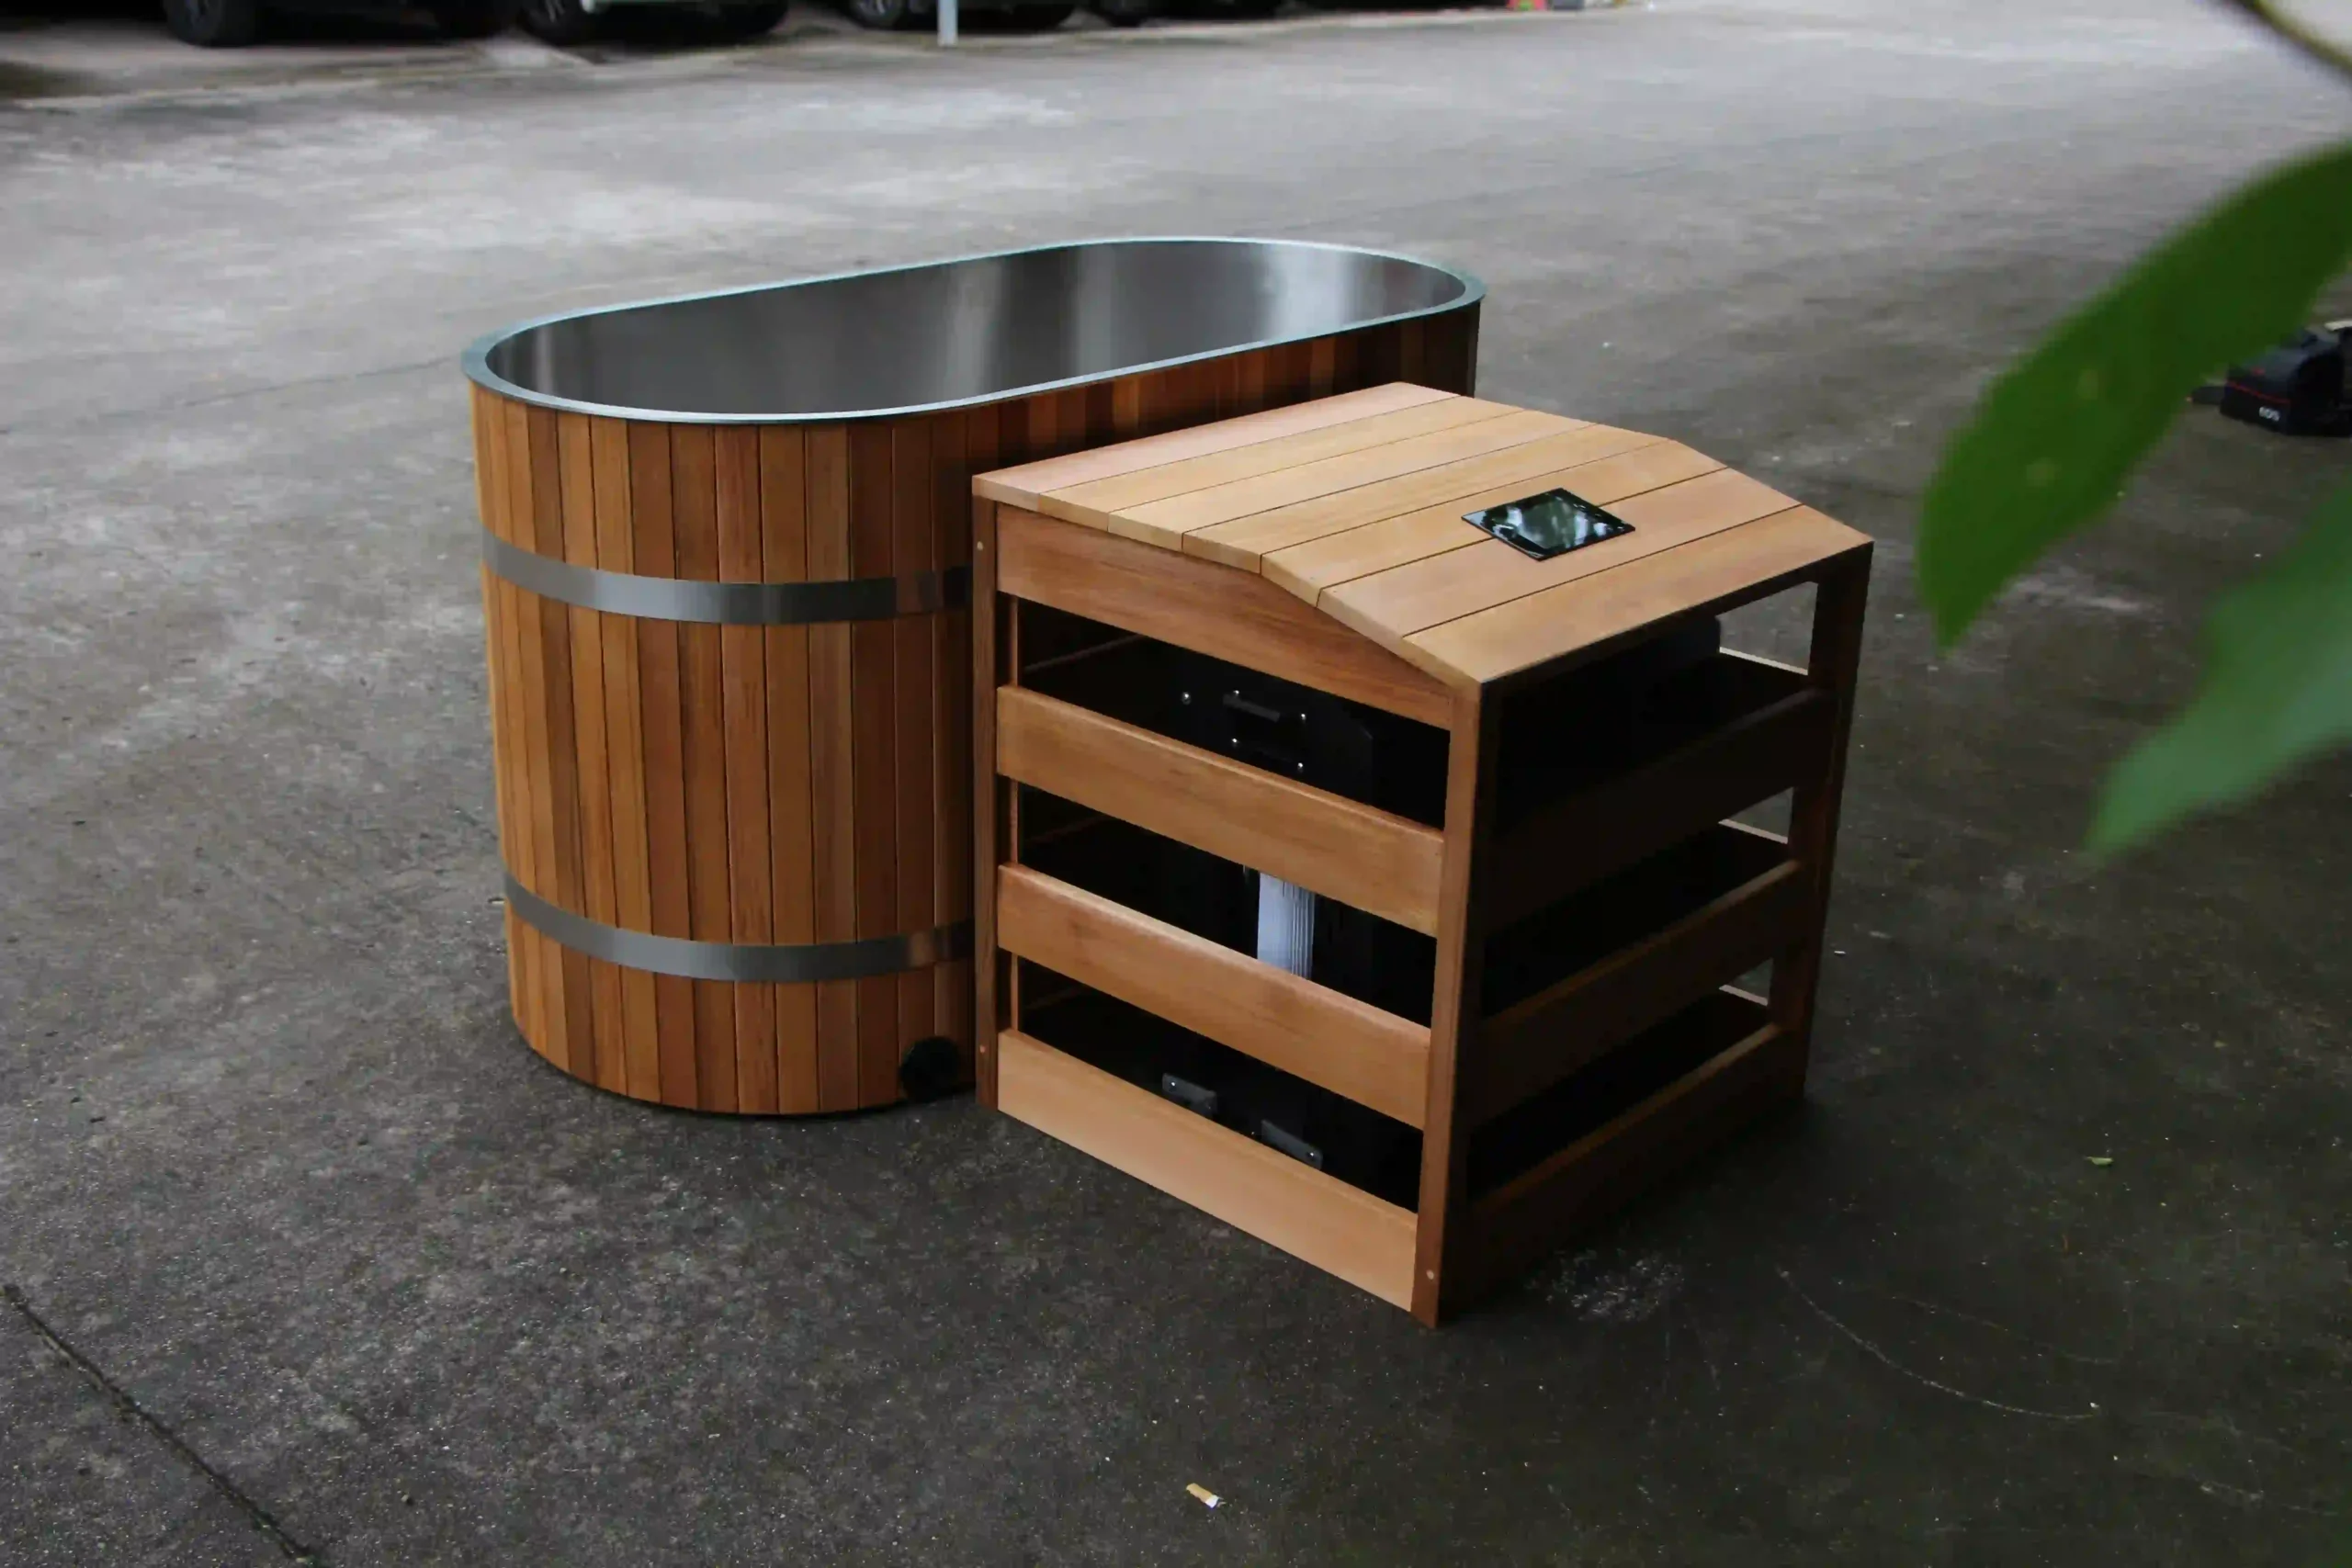
When connecting your tub and chiller, the filter is your water’s first line of defense. For this setup, we recommend:
Cartridge filter (20–50 micron) for fine debris removal
Transparent housing for easy inspection
Sealed connections to avoid suction loss
Mesh filters may be reused for short-term setups, but for long-term daily plunging, cartridges outperform on clarity and protection.

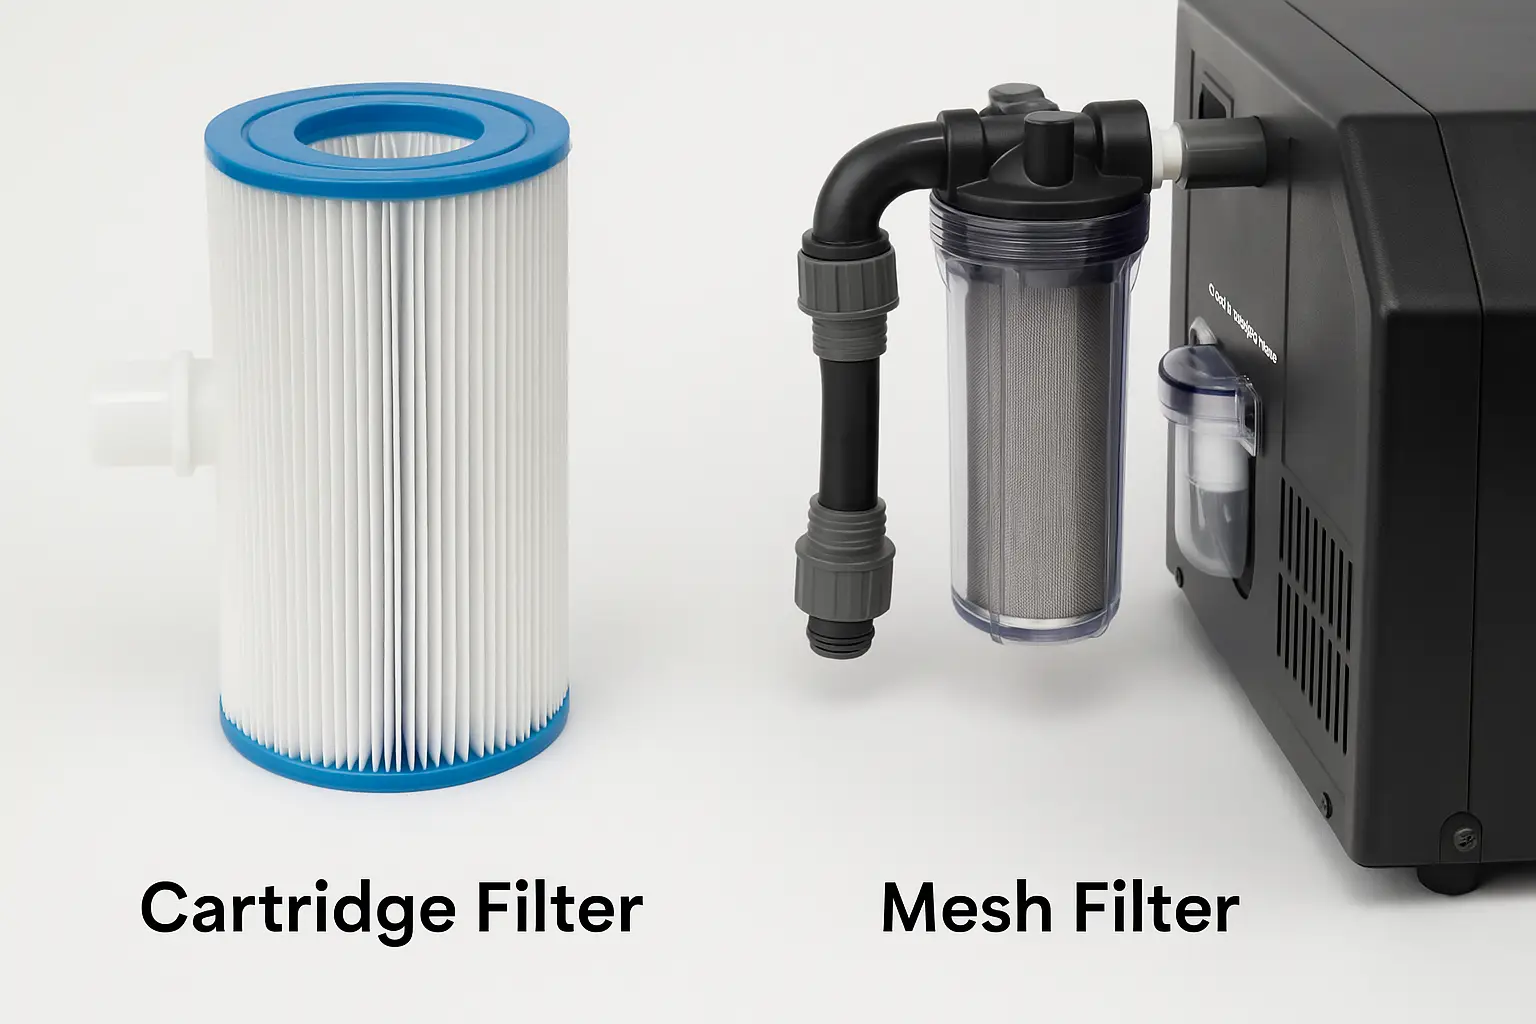
Comparison of filter types commonly used in plunge systems
🧰 Installation Tips for Cold Plunge Filtration Systems
To avoid the most common issues—like flow alarms or airlocks—follow these best practices:
Place the filter on the suction line before the chiller
Keep hose lengths short and minimize bends
Prime the pump properly and bleed air after install
Check all clamps monthly and replace filter biweekly
🔗 Want to avoid these issues entirely?
Read our water flow troubleshooting guide
🌐 External Best Practice References
✅ Final Tips for Building a Cold Plunge Chiller System
- The right cold plunge chiller and filter setup transforms your plunge from a basic tub of cold water into a consistent, low-maintenance recovery system. By pairing a reliable chiller with a filter that matches your flow rate and tub volume, you avoid common pitfalls and maximize performance.
If you’re planning a long-term cold plunge setup, understanding how cooling and filtration work together is essential.
To see the full breakdown of hygiene, filtration logic, and system design principles, read our in-depth guide on 《why a cold plunge chiller with filter is essential for clean recovery》.


